DIY Guide: How to Install Artificial Turf Like a Pro
Thinking about installing artificial turf on your own? With the right tools, materials, and some guidance, you can create a beautiful, low-maintenance outdoor space. This installation guide will walk you through each stage of the process, from prepping your yard to the final maintenance touches. If you need quality turf, supplies, or expert advice, Elite Turf Supply is here to help and just a call away!
Materials You Will Need to Lay Artificial Turf
-
- Turf
-
- 10 Inch galvanized steel nails
-
- Turf nails
-
- Grass glue
-
- Base fill
-
- Infill
-
- Seaming tape
-
- Hammer
-
- Stiff bristle broom
-
- Blended Barrow
Tools You Will Need to Lay Artificial Turf
-
- Rake
-
- Wheelbarrow
-
- Hand tamper
-
- Hammer
-
- Pick Axe to pull up Sod or Skid Steer/excavator
-
- Plate Compactor
-
- Utility knife
-
- Shovel
-
- Carpet kicker
-
- Carpet Scissors
-
- Tape Measure
-
- Garden hose
-
- Drop spreader
Step 1: Clear and Prepare the Site
To start, you’ll need to remove any existing grass or vegetation, digging down about four inches. If there’s a concrete border, clear out turf to its slag line. If you’re worried about buried gas lines—these are usually 18 to 24 inches deep–they shouldn’t interfere, but it’s always safer to call Blue Stakes for free utility marking.
Disposing of the old turf at a green waste dump will ensure an eco-friendly project start. If you uncover sprinkler pipes, cap off any “funny hoses” and remove active PVC pipes to prevent water damage that could sink your turf’s base.
Step 2: Compact and Level the Ground
Level, compact ground is key to a smooth, stable artificial grass installation. Backfill any trenches from removed PVC pipes and compact them well. Creating a solid edge, like cement or curbing, will secure the turf and give it a finished look. If you don’t have an existing edge, use bender board or metal edging to define the area.
Step 3: Lay the Base Material
For effective drainage, choose a well-draining base fill. Blended barrow with squeegee mix is ideal, but if unavailable, lay down about 2.5 inches of ¾-inch gravel followed by 1.5 inches of crushed fines. Spread the base evenly and keep a slight slope away from your house for optimal drainage. Use any gravel calculator online to determine how much material you’ll need based on your area size. You will want to fill the area of sod you removed, so about 4 inches deep.
Step 4: Compact the Base
After spreading the base, soak it with water and let it sit for about 10 minutes. Use a hand tamper or rent a plate compactor to achieve a firm, level surface—this will help your artificial turf stay in place and look smooth.
Step 5: Roll Out the Turf
Before cutting the turf, let it unroll and sit in the sun to allow expansion. When ready, lay the turf with the grain facing toward your house for a natural look. Mark your cuts with a chalk line on the underside. An “S” cut along the edges will help create seamless joints between pieces. Cut a little extra length (about 6 inches) initially to allow for the “ess” cut along edges, and change blades on your utility knife every 10 feet to keep cuts sharp.
Step 6: Seam the Turf
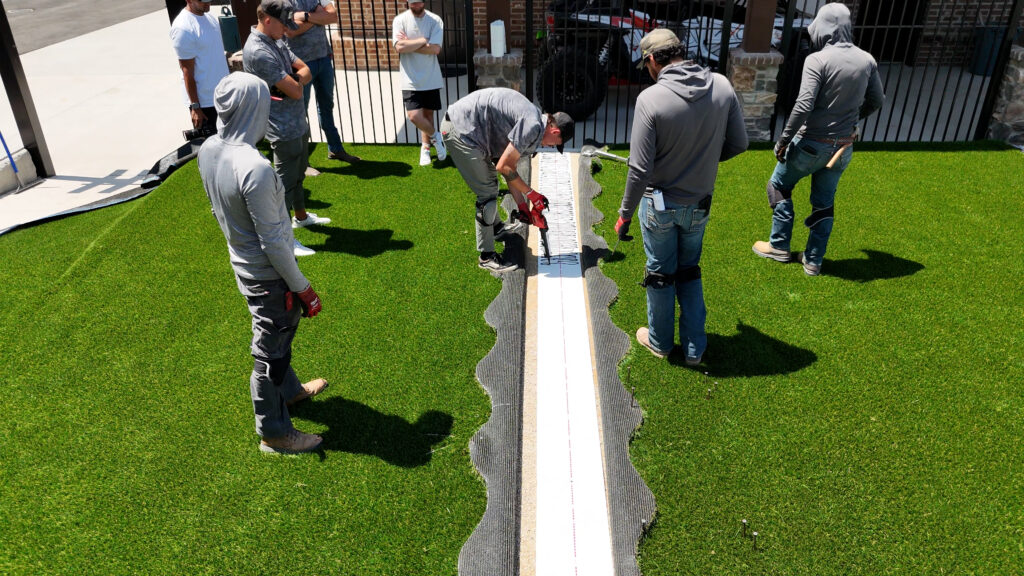
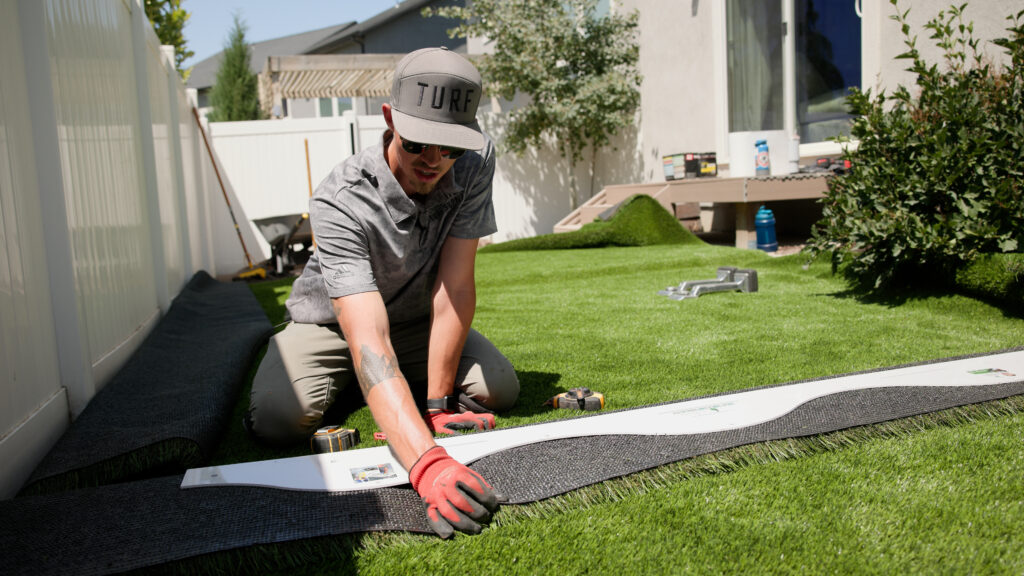
Align the edges of each piece carefully to avoid visible seams. Place seam tape along the cuts and apply glue, making sure no grass blades get into the glue. Secure the turf with bags of infill on top while the glue sets—around 30 minutes on a warm day should do it. Use carpet kickers to pull the turf taut and eliminate wrinkles, anchoring the edges with 6-inch nails every 3-4 inches along hard edges and 4-6 inches along fence lines.
Step 7: Add Infill
Infill is crucial for stability and blade support. Elite Turf Supply recommends Envirofill, an antimicrobial infill that’s safe for pets and children. Use a drop spreader to apply roughly 2 pounds of infill per square foot, and a hard spreader for tight edges. Power broom the turf to evenly distribute the infill and help blades stand up. If you don’t have a power broom, a stiff-bristled broom will work—just brush against the grain. Once finished, water the turf to compress the infill.
Step 8: Maintain Your Turf
Over time, you may need to add a bit of infill to keep the blades standing tall. A quick sweep every few months will also help maintain its fresh, natural look. Elite Turf Supply offers all the materials you need to keep your artificial grass looking its best year-round.
Ready to Get Started?
Installing artificial turf can be a rewarding DIY project, and Elite Turf Supply is here to support you. From premium turf to quality infill and installation tools, we’ve got everything you need for a professional finish. Click here to see a complete video tutorial by our experts at Elite Turf Supply. Visit us online to browse supplies or contact us for expert advice.

