Seaming artificial turf correctly is an essential part of ensuring your installation looks flawless and natural. Whether you’re a DIY enthusiast or a professional installer, understanding the proper techniques for joining artificial grass can make all the difference. This guide will walk you through the steps to create nearly invisible artificial grass seams using the right tools and methods.
For high-quality supplies and expert advice, be sure to reach out to Elite Turf Supply, the trusted artificial turf wholesaler serving Utah and Idaho.
Why Proper Seaming Matters
A poorly executed seam can make your fake grass installation look uneven or unnatural. By following the correct procedure, you’ll create a seamless, durable surface that stands up to wear and tear. Additionally, using top-notch materials like turf seam adhesive and sharp tools ensures professional-grade results every time.
Tools and Materials Needed
- Artificial grass
- Utility knife (replace blades every 10 feet for optimal sharpness)
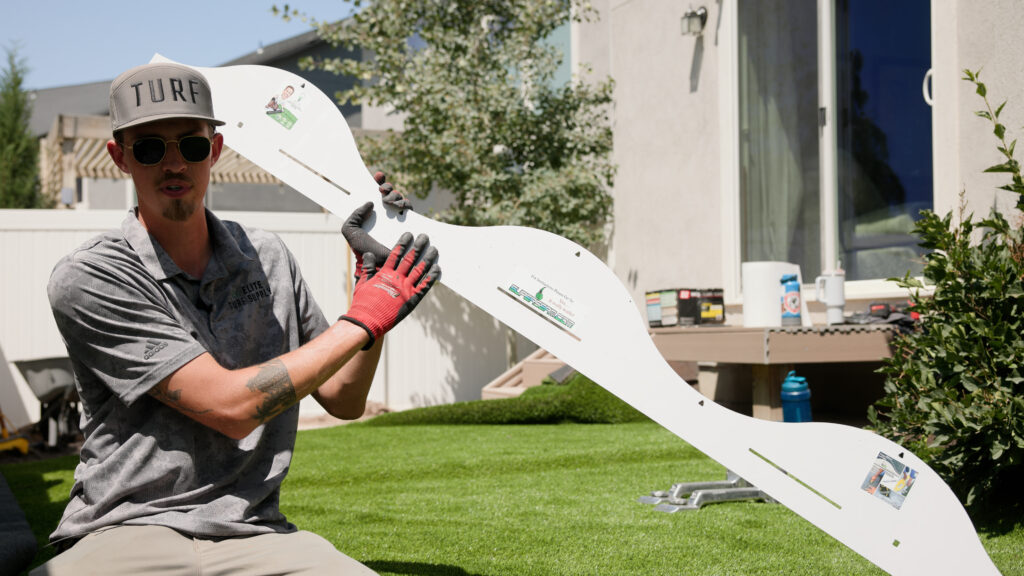
- Plastic seam template or seam tool
- Turf seam adhesive
- Seaming tape
- Adhesive spreader
- Measuring tape
- Weighted objects (optional)
Step-by-Step Guide to Seam Artificial Turf
1. Align and Overlap the Turf
Start by laying out your turf pieces with a 6-inch overlap along the edges. This overlap allows you to make precise cuts and ensures the seam will blend naturally.
2. Use a Seam Template for Precision Cuts
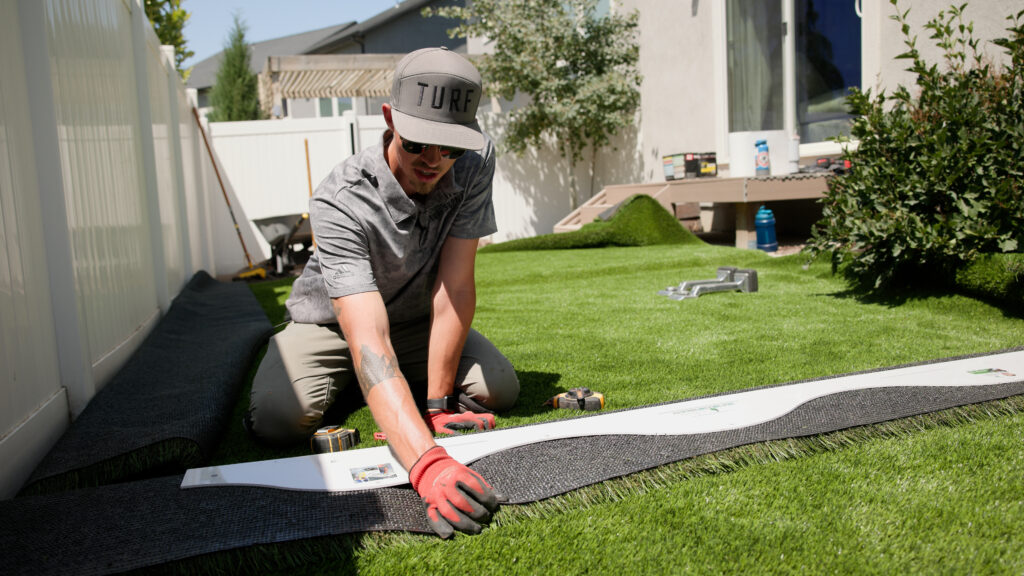
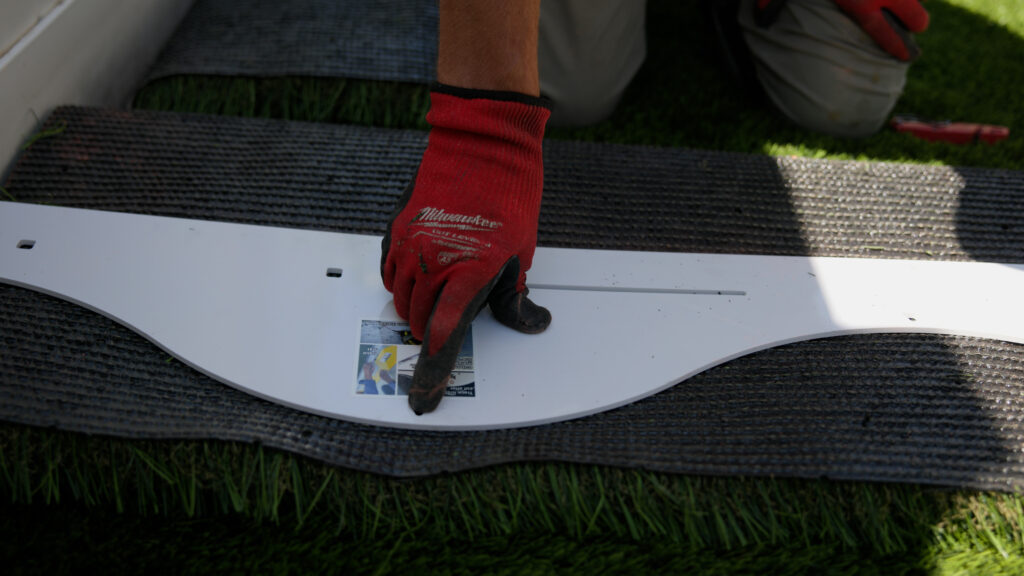
To create less visible seams, use a plastic seam template or seam tool. Place it along the overlap and trace a wave-like cut pattern using a sharp utility knife. The wavy cut helps disguise the seam by preventing straight-line visibility.
Pro Tip: Change your utility knife blade every 10 feet of turf cutting to maintain clean edges.
3. Trim and Prepare Edges
Once you’ve made the cuts, lay the turf edges flat to check alignment. Trim any uneven edges if necessary to ensure the two pieces fit snugly together.
4. Apply Turf Seam Adhesive
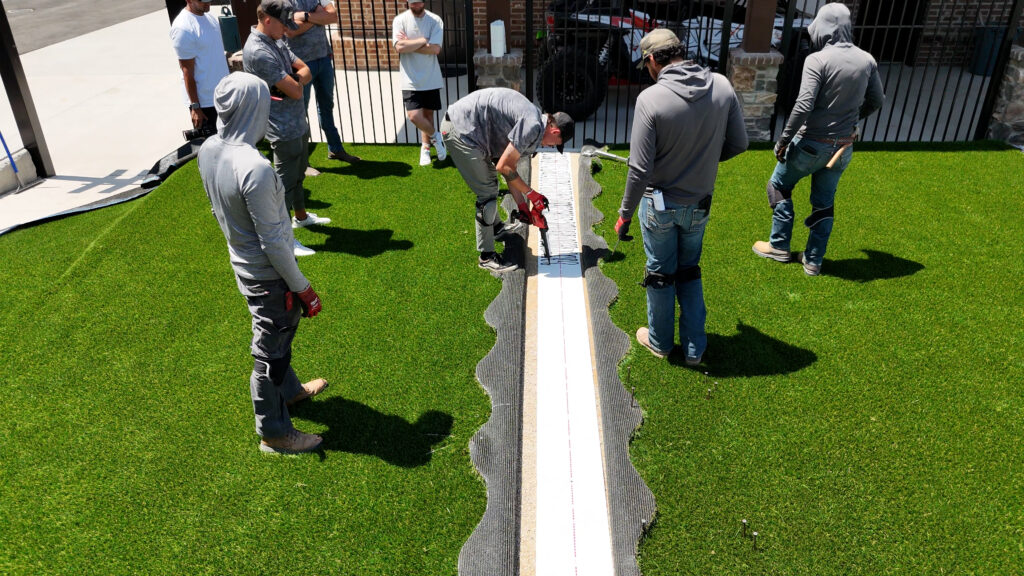
Roll out the seaming tape along the seam line, with the adhesive side facing up. Use a spreader to apply turf seam adhesive evenly across the tape. Be generous but avoid overapplication, which can cause adhesive to seep through the turf fibers.
5. Join the Turf Edges
Carefully place the trimmed turf edges onto the adhesive-covered tape. Press down firmly to ensure a strong bond. Work slowly to ensure alignment and avoid gaps.
6. Secure and Set the Seam
Use weighted objects or walk along the seam to press the turf into the adhesive. This helps the adhesive bond securely and prevents movement as it dries.
Pro Tip: Allow the adhesive to cure fully, typically 24 hours, before subjecting the turf to heavy use.
FAQs
Can I seam artificial turf without adhesive?
While some methods involve mechanical fasteners, using turf seam adhesive provides the strongest, most durable bond. Adhesive also ensures a smooth and natural look.
How do I hide seams in artificial grass?
Cutting the turf in a wave pattern, aligning edges carefully, and using quality adhesive are the best ways to minimize seam visibility.
Do I need professional help to seam turf?
Many DIYers can successfully seam artificial turf with proper tools and materials. For expert advice or supplies, contact Elite Turf Supply.
Why Partner With Elite Turf Supply?
Elite Turf Supply offers everything you need to complete your artificial turf project, from premium materials like turf seam adhesive to the necessary tools and supplies, to personalized guidance. Whether you’re installing a backyard putting green, playground surface, or sports field, their team has the expertise to help you succeed.
Contact Elite Turf Supply today for high-quality turf products and expert advice on how to seam turf and more! Click here to see a full video on the artificial turf installation process.

